Lotion dyes are one of the most versatile disc dyeing methods available to disc dyers! They’re relatively beginner friendly, offer the widest available array of colors (nowhere near as many “issues” with certain colors not working well with the medium, like with clear glue beds), and are the easiest way to get eye-grabbing color saturation into whatever plastic you’re working with.
In addition to typical lotion beds, dyed lotion can also be used to color in stencil dyes if you’re doing something that isn’t practical to do a hot dip. Dyed lotion is also great for doing a variety of different pours (split cups, ring pours, etc–if you don’t know what I’m talking about, go search YouTube for acrylic paint pours).
My goal in writing this guide is to give you the best methods I’ve found for getting consistently good results, no matter how you want to use this medium. Let’s start out by talking about the things you will need. Also, I want to take this opportunity to direct you to my Disc Dyeing 101 guide if you are a first time dyer, before you go any further in this specialized guide. In it I explain a lot of things about plastic selection, set times, and basic terminology.
Amazon Affiliate Link Disclosure: As an Amazon Associate we earn commissions from qualifying purchases made through some links on this post. There are no additional costs for you and it helps support our website. This does not affect which products are included in this post, and in most cases the writer is not aware of which brands and products offer us a sales commission.
Materials List
Dye–this is the most important ingredient! There are several different dyes available to use, but PROChemical & Dye is tops, for several reasons. These folks have the best stuff for what we want to do, at a fair price. They have been amazing at developing new colors for us disc dyers, and they go out of their way to source pigments that are as economical as they can be. While there are other things you can use, I am proud to support this company and would highly recommend them above all others. If you are a first-time dyer, you can even visit the discdyeing.com DIYdye kits and supplies page and find some well-priced kits that let you dip your toes into the disc-dyeing waters. Should you choose to just buy individual colors from PCAD, the 2oz container is more than sufficient for a 1st time purchase.
You can also use iDye Poly (it MUST be the IDYE POLY, for synthetic fabrics!), and there are a few shades of color that iDye has that I use (silver grey, gunmetal, violet, pink) that are great. When you look at cost per ounce, PCAD is the more economical choice, but if you happen to live somewhere that has a big crafting supply store (Michael’s, Joann’s, etc) you might be able to find some there. RIT Dyemore works okay in a pinch, but it is honestly an inferior product to either of the aforementioned dyes.
Some people love using worm dip in their lotion dyes, and get excellent results with it. However, something you need to consider is that the main ingredient in worm dip is acetone, which will damage stamps. I’ve used it with mixed results, in regards to stamp integrity–sometimes it works fine and doesn’t harm it, other times it will break down the stamp.
The next thing you need is to choose a lotion, and this is really more about personal preference than anything else. The main lotion I use for my blank beds is Queen Helene cocoa butter, and I use Suave cocoa butter for my dyed lotion mixes, because it is thicker. If you are making a standard dyed lotion bed, you will probably want your dyed lotion mixes thinner than someone who is using dyed lotion to primarily color in stencil dyes. I have noticed a wide variance of overall consistency in all brands of dyed lotions. There’s times I’ve bought Queen Helene and it has been very thin and watery, other times it’s just as thick as the Suave. Suave also recently changed their formula, and it is even thicker than it previously was.
Plastic squeeze bottles are the next item to make sure you have. I use these clear plastic condiment bottles, I prefer the 12 or 16 oz size. When I first started dyeing, I used these bottles to apply dyed lotion to my beds, and will work okay, but these precision-tipped plastic squeeze bottles are really the way to go. I like to mix up my dyed lotion in the large plastic bottles, and then squirt the lotion into the smaller precision tipped bottles.
Another thing that I do with my lotion dyes is add floetrol, which is a latex paint additive that painters use to get more coverage from paint, and reduce brush marks. However, acrylic paint pourers (and subsequently, disc dyers) also use it to help create cells. I started using it because I would get frustrated by putting a domey disc into a lotion bed, and having the fine detail in the center of the disc get smooshed as the disc is pushed down into the bed. Using floetrol is not necessary, but is highly recommended. You can find it at most home improvement stores (Lowes, Home Depot, Menards, etc), but I recently read that the company who produces floetrol is not going to be producing it much longer, so it may be difficult to find. I’d suggest grabbing a couple of gallons of it should you decide to use it.
Acetone is not needed in lotion dyes, and can be quite detrimental. I do, however, recommend adding just a bit of denatured alcohol (to be covered more in-depth later in this guide). I consider denatured alcohol to be an essential ingredient for disc dyeing, so if you don’t have any, I’d recommend grabbing a quart of it.
Mixing up your dyed lotion
So now you have all of your materials together, and you’re ready to start mixing up your dyed lotion! One of the most common questions I get is, “What are your ratios?” Generally speaking, ½ tsp of dye for every 2 oz of dyed lotion you plan to make is a good starting point. There are some colors (iDye crimson, PCAD blood red, lilac, among others) that are quite potent, and you could get away with using less. There are other colors (PCAD lavender, clear orange, and any variant of turquoise–which I would honestly recommend you avoid altogether unless using a VERY high concentration of dye as well as using heat) that you may want to go a bit heavier on the dye.
When mixing up your dyed lotion mixtures, the most important thing is that you get all of the dye fully dissolved. This can sometimes be a challenge, as the dye powder will sometimes clump together and congeal, which presents several problems–you’re not getting all of the color distributed throughout the lotion, and these globs will clog up the nozzle of your squeeze bottle. To avoid this, add your dye powder to the plastic squeeze bottle. Then, add ½ oz HOT water, and ½ oz denatured alcohol. Then put the cap back on the bottle (I recommend putting a scrap piece of paper towel over the capped nozzle before tightly holding the cap on with your finger) and SHAKE vigorously, as long as is needed to ensure that all of the dye powder is fully dissolved. Then, add your lotion to the bottle. I suggest filling the bottle up about halfway with lotion, re-cap the bottle, and shake it very well before removing the cap and filling it up the rest of the way with dyed lotion. Be sure that you leave enough empty space inside the bottle so that the lotion mixture can be shaken around and agitated.
For my dyed lotion mixtures, I also like to add a bit of floetrol. So for a 12 oz bottle of lotion, I use 3 tsp of dye, about 8 oz of lotion, and 4 oz of floetrol. If you’re going to be using dyed lotion to lotion paint stencils, I’d use 2 oz more lotion/less floetrol for a thicker consistency. The main way I determine if my mixtures are right is mostly by how it comes out of my squeeze bottle. If it’s too thick, it will curl over on itself (think like the squiggly white icing on top of Hostess cupcakes), but if it’s too thin, it will run and be more likely to blend with adjacent colors. Finding the right consistency to do what you want is honestly one of the most challenging parts of doing lotion dyes.
You also need to have a “bed”, which is whatever you’re going to put your dyed lotion design into. I recommend using an ultimate frisbee, or a 9” cake pan or Pyrex pie plate (though if you are dyeing a larger diameter disc, beware! Your bed will need to be deep enough so that the full surface of the disc makes contact with all of the bed).
I also HIGHLY recommend having a butane torch to help you pop bubbles in your bed.
Should you find that your dyed lotion mixtures are too runny, you can use a mixture of cornstarch/cold water (think “making gravy”) to thicken it.
Building your bed
Now that you have your dyed lotions mixed up, it’s time to build your bed! Most of the time when I’m doing a lotion bed, I use my ultimate frisbee as the bed. As I mentioned earlier, I prefer to use a blend of lotion/floetrol for my blank bed (the medium that fills your bed, that has no dye in it), I typically use a blend of about 60% lotion and 40% floetrol. If the disc I am dyeing is very domey, I flip that proportion. If the disc I am dyeing is quite flat, I use about a 70/30 lotion/floetrol blend. This is so that after I am finished making my design and I put the disc in the bed, the disc’s own weight slowly sinks it down flush with the surface of the bed, rather than me having to push the disc down adequately into the bed, and subsequently smooshing the fine detail in the center of the bed. I have a Pyrex 1 cup measuring cup that I use to mix up my blank bed blend, and use a spoon to thoroughly stir the lotion/floetrol, and then pour it into my bed. This is about 10 oz of total medium.
After putting the blank lotion in the bed, I pick up my bed about 3-4 inches over my table, and drop it–repeat this 50 times. This helps bring any air bubbles to the surface, and then I go over it with my butane torch to pop the bubbles. Repeat as needed until you don’t see any more air bubbles.
Now, for the fun part–making your design! Think ahead of how you want to lay out your design. One thing you want to keep in mind about lotion dyes, is think about which colors are going to be adjacent. This is important because in lotion dyes, you will quite often have some blending of colors, and if you are using complimentary colors that look good together (orange/blue, red/green, etc), they will mix to make brown. Most people want to avoid that. This is much less of a concern if you are using colors that mix well (red/orange/yellow, blue/green, pink/purple, etc). You can use complimentary colors together, but I would recommend putting some sort of a buffer between the two (black works well for this) to avoid blending.
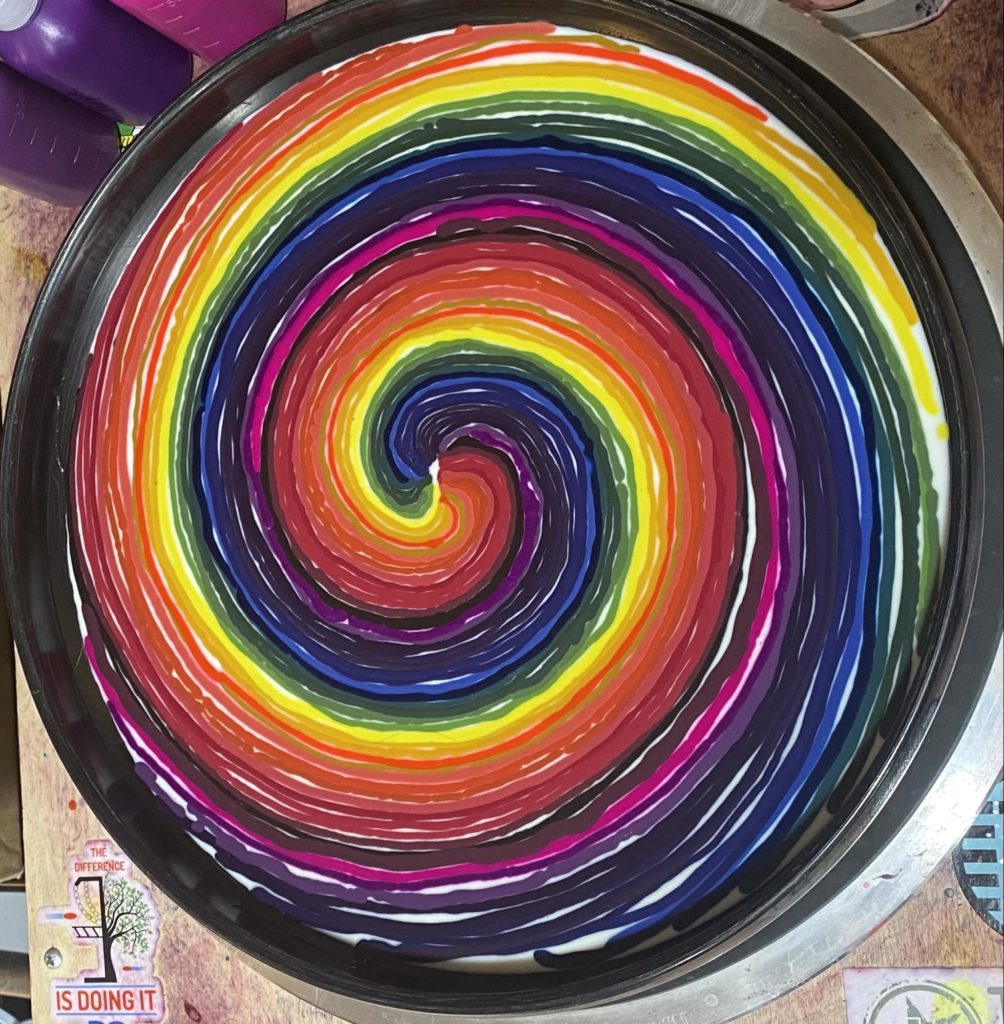
After laying down your dyed lotion pattern, I recommend using the butane torch (keep it moving, don’t keep it in one spot!) across the design to pop any air bubbles that you might see.
Then, it’s time to “rake” the bed using a toothpick, paintbrush handle, etc. Some people prefer to manipulate their beds without a pick, and will “roll” the bed around (think like someone that is panning for gold). There’s really no wrong way to do this, unless you do too much random swirling and you end up with an overmixed bed that loses all its definition. After raking your bed, go over it one more time with the torch to pop any bubbles, again keeping the torch moving.
Sending it
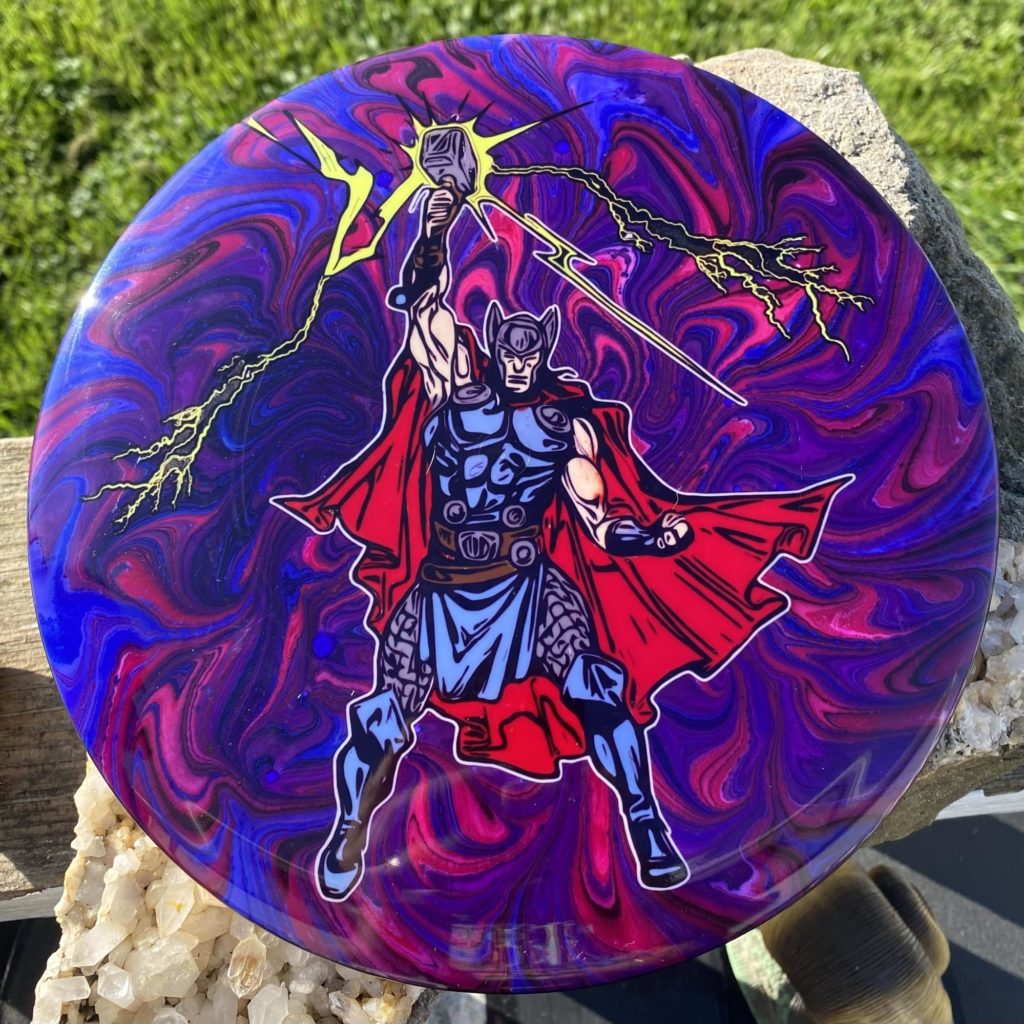
Now that your bed is complete, it’s time to put the disc into the bed (affectionately known amongst disc dyers as “sending it”). But first, make sure your disc is cleaned well (refer to my Disc Dyeing 101 guide for more specific information about this). How you lay the disc into the bed is largely dependent upon how domey the disc is. If it is very domey, you want to lower the disc so that the center of the disc touches the bed first. If your disc is very flat (Discraft Zone, Westside Anvil are the first ones that come to mind), you want to allow one edge to touch the bed first, and then imagine that the part of the disc touching the bed is acting like a hinge on a door, and you “close the door” and push the rest of the disc down into the bed, being mindful of avoiding any air pockets between the disc and the bed. You might want to use a thumb in the center of the disc and slightly push out to help avoid these air pockets. Once the disc is in the bed, and you are certain that the disc has full contact with the bed all the way around the rim, you’re ready to let it set.
In my Disc Dyeing 101 guide, I have a section where I discuss set times for different plastics. There are several different schools of thought in regards to set times, with whether or not you are using heat being the biggest variable in play here. Some folks will use heat lamps or the sun, combined with shorter set times, and get great results. If you are not using heat, I highly recommend a minimum of 24 hours. Remember, your disc will only get one opportunity to absorb color, and will spend the rest of its life not only NOT absorbing color, but the process of fading begins the moment you clean it off.
After your disc has set a sufficient amount of time, carefully remove the disc from the bed and rinse/scrub it off in the sink with soap and hot water.
Lotion Painting
The other main practical application of dyed lotion is to use it to color in a stamp or a stencil dye. Think of it like a coloring book with extra steps. The main thing you need to consider when lotion painting a stamp or a stencil, is that once you put the dyed lotion on the disc, if the lotion dries out, it is no longer transferring color to the plastic! You have to keep the lotion moist. The easiest way I’ve found to do this is to take an empty bed (I personally prefer to use a 9” Pyrex deep dish pie plate for this), spritz the inside of the bed with a fine mist of water, and then flip the bed over and put it on the disc. I then use a heat lamp, because these dyes LOVE heat, and after a few hours, clean the disc off. I often need to repeat this process to get the amount of color saturation that I want. The heat lamp is totally optional, but if you don’t use it, be sure to allow an adequate set time (overnight is best). I usually use the same needle-tipped lotion bottles that I build my beds with to do my lotion painting, but sometimes I need to mix colors or use a toothpick dipped in dyed lotion for very fine detail areas.
I hope I’ve given you some information that you can use to help avoid common pitfalls, and get the kind of results you’re wanting. If you’re new to disc dyeing, remember, you’re going to make mistakes when–we all do! The important thing is learning from those mistakes, figuring out why they happened, and avoiding them in the future. If you have any specific questions, feel free to reach out to me via Instagram (@pipedreamer79), and if you’d like a more personalized, guided experience, I do offer 60 minute 1-on-1 dye tutoring sessions via Zoom! Best of luck to you, and remember, you don’t get better at things by not doing them!